
TL;DR
A closet can become a surprisingly good vocal booth if you focus on placement, sealing gaps, and proper dampening. Moving equipment into a dedicated, ventilated space often beats expensive foam panels alone. Proper setup reduces echo, leaks, and low-end buildup for professional results.
Imagine turning that tiny closet into a professional-sounding vocal booth or AI rig hideaway. It’s easier than you think, once you understand the key to sound treatment isn’t just foam. Understanding acoustic dampening is essential for effective setup. It’s about placement, sealing, and strategic absorption—making your small space into a quiet, effective studio.
This guide will show you how to optimize your closet for sound, whether you’re recording, gaming, or running a high-powered AI workstation. You’ll learn the secrets of dampening, where to place your gear, and how to avoid common pitfalls that turn your setup into a muddy, echoey mess.
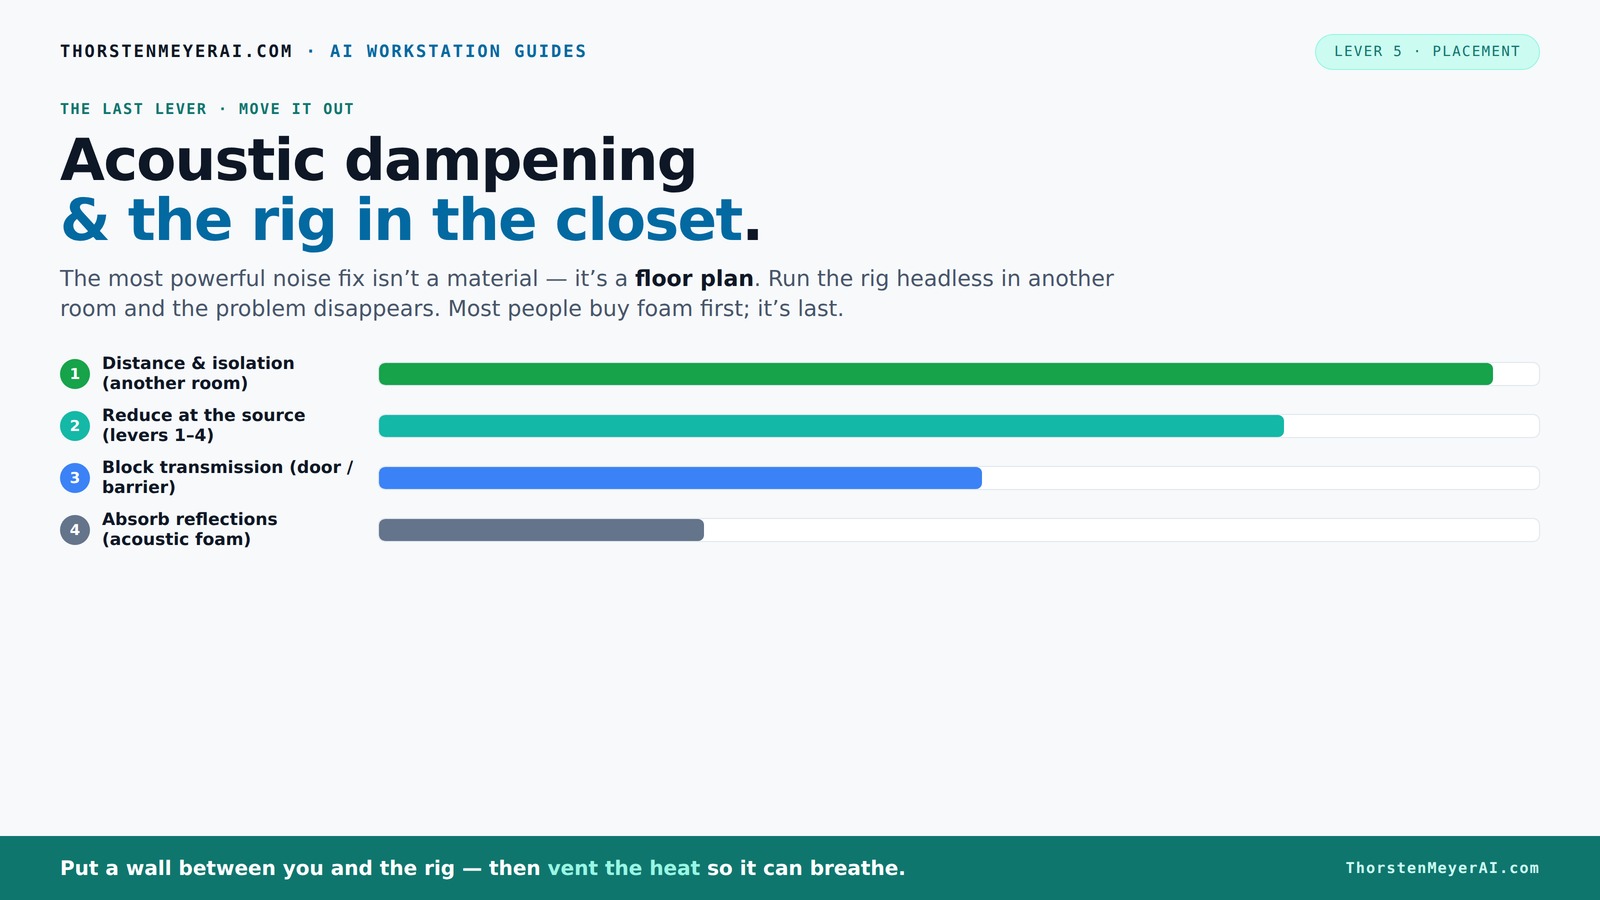
Acoustic dampening
& the rig in the closet.
The most powerful noise fix isn’t a material — it’s a floor plan. A rig you can’t hear because it’s in another room beats any amount of foam. Tap the approaches in Part 1 to see what actually works.
(another room)
(levers 1–4)
(door / barrier)
(acoustic foam)
Contain the noise, not the heat
Key Takeaways
- Use a combination of sealing gaps, absorbing reflections, and strategic placement to get the best sound in a closet.
- Moving your rig into a separate room or closet often beats expensive foam treatments for noise reduction.
- Ventilation and heat management are critical—sealed spaces trap heat, risking damage and throttling.
- Place your mic at least a foot from reflective surfaces and use directional mics for cleaner recordings.
- Don’t rely on foam alone—cover walls, door gaps, and ceiling with absorptive materials for professional-quality sound.

Focusound 52 Pack Acoustic Foam Panels 1" x 12" x 12" Sound Proof Foam Panles Soundproofing Noise Cancelling Wedge Panels for Home Office Recoding Studio with 300PCS Double-Side Adhesive
Soundproofing - Acoustic foam panels triangular grooves structure for better noise absorption, helps to reduce and absorb unwanted...
As an affiliate, we earn on qualifying purchases.
As an affiliate, we earn on qualifying purchases.
Dampening vs. Soundproofing: What’s the real difference?
Many people think foam panels are the magic fix, but it’s more nuanced. Acoustic dampening reduces echo and reflections inside your space, making it sound warmer and clearer. Think of it like softening a room’s echo. Learn more about proper acoustic dampening techniques.
In contrast, soundproofing stops sound from escaping—blocking leaks through gaps, doors, and walls. It’s about creating a sealed fortress that prevents noise bleed.
For a closet, dampening inside is great for controlling reverb, but sealing gaps around the door and outlets is what keeps noise from leaking out. You need both, but they serve different purposes.

Portable Recording Booth for Home Studio, Foldable Sound Isolation Vocal Shield with Floor Stand, High-Density Acoustic Blanket Enclosure for Singing, Voiceover & Podcast, Includes Phone Holder
INSTANT STUDIO-QUALITY "DRY" SOUND: Transform any noisy room into a professional vocal booth instantly. Engineered with high-density acoustic...
As an affiliate, we earn on qualifying purchases.
As an affiliate, we earn on qualifying purchases.
Where to place your mic and equipment for the best sound quality
Your microphone’s position is crucial. Place it away from reflective surfaces like walls and ceiling. Aim for a sweet spot, usually a foot or two from the wall behind you, to avoid capturing unwanted reflections. For detailed tips, see microphone placement advice.
Use a directional mic if possible—these focus on your voice and cut down on room noise. A pop filter helps tame plosives and breath sounds, making your recordings cleaner.
For the equipment, keep the rig as far from the mic as possible, and avoid placing it directly on a desk surface. Use anti-vibration pads or rubber feet to reduce structure-borne hums.
In practice, a DIY setup might involve hanging a blanket behind the mic, placing foam panels at reflective surfaces, and positioning your gear in the corner away from your recording zone.

TroyStudio Portable Vocal Booth, Large Foldable Microphone Isolation Shield, Music Recording Studio Sound Echo Absorbing Box, Desk & Stand Use Reflection Filter with Thickened Dense Acoustic Foam
【BASIC INFO】: Inside size after setup: 8'' (L) X 10'' (W) X 12'' (H), large space for various...
As an affiliate, we earn on qualifying purchases.
As an affiliate, we earn on qualifying purchases.
Treating surfaces: walls, door, ceiling, and floor
In a tiny closet, most reflections bounce off the walls, ceiling, and door. Cover these with absorption materials—foam panels, blankets, or DIY solutions like hanging quilts. Focus on the wall behind the mic and the side walls closest to you.
Doors and gaps are sound leaks. Seal them with weatherstripping, acoustic sealant, or door sweeps. Every crack is a portal for noise.
Ceilings often cause flutter echo. Hang a thick blanket or install bass traps in the corners to tame low-end buildup. The floor? Use rugs or carpets to absorb footfalls and reduce reflections.
A comprehensive approach involves covering at least 50-70% of the wall surfaces with absorption, especially at reflection points. Discover more about effective room treatment at room acoustic treatment.

VEVOR 2 Pcs Sound Dampening Blankets, Soundproof Curtains with 96 x 80 in, Soundproof Blanket with Grommets, Studio Grommeted Blanket, for Window, Door, Light Blocker, Music Recording, Black
Sound Absorption & Noise Reduction: Made with a polyester woven surface and recycled cotton filling, this 3-layer physical...
As an affiliate, we earn on qualifying purchases.
As an affiliate, we earn on qualifying purchases.
The "rig in the closet" setup: what you need and what to avoid
Setting your AI or gaming rig in a closet *can* work wonders for noise reduction—if you do it right. The key is proper ventilation, sealing, and absorption.
Use a small vent or duct with a fan to pull hot air out. Never fully seal a space that houses heat-generating equipment; trapped heat kills performance and can damage components. For more on creating a safe AI rig setup, visit Elfy’s World.
Include a few essentials: a power strip, cable management, and a quiet exhaust fan. DIY solutions range from hanging blankets to installing specialized soundproof cabinets.
Be cautious: a sealed closet traps heat, causing thermal throttling. Regularly monitor the temperature, and consider liquid cooling or external exhausts to keep it cool.
Common mistakes and how to fix them
One mistake is relying solely on foam panels. While helpful for echo, they do little for leaks or low frequencies. Combine absorption with sealing gaps for best results.
Another pitfall: placing the rig directly on the floor or a thin desk. Use rubber feet or anti-vibration mounts. This reduces structure-borne hums that foam can’t touch.
Over-treating with thick foam can deaden the sound too much, making your recordings muddy. Balance absorption with some reflective surfaces for a natural tone.
Lastly, neglecting ventilation leads to overheating. Always include airflow solutions when sealing a space.
Frequently Asked Questions
What’s the difference between acoustic dampening and soundproofing?
Acoustic dampening reduces echo, reflections, and reverb inside a space, making it sound warmer and clearer. Soundproofing, on the other hand, blocks sound from leaking out through gaps, doors, and walls, preventing noise from escaping or entering.
Can a closet actually become a good vocal booth?
Yes, with proper treatment—covering reflective surfaces, sealing gaps, and adding absorption—small closets can produce clear, professional vocals. The key is controlling reflections and leaks, not just adding foam.
Where should I place the microphone in a closet setup?
Place the mic at least one foot away from reflective surfaces, pointing away from walls and the door. Position it near absorption panels or blankets to minimize room reflections and achieve a cleaner sound.
How much acoustic treatment do I need?
Cover at least 50-70% of the wall surfaces with absorption materials, focusing on reflection points. Seal gaps around doors and outlets, and add bass traps if you notice low-end muddiness.
Do foam panels work, or do I need thicker material?
Foam panels are great for high-frequency reflections but struggle with bass and leaks. Thicker, denser materials like bass traps or moving blankets improve low-frequency control and overall sound quality.
Conclusion
Turning your closet into a quiet, professional-sounding workspace is less about buying endless foam and more about strategic placement, sealing, and ventilation. When you treat the space comprehensively, you create a studio that sounds great without sacrificing comfort or risking heat buildup.
Remember: the best soundproofing is often just moving the rig away from your ears. A well-ventilated closet, thoughtfully treated with absorption and sealing, can be your new favorite corner of the house.